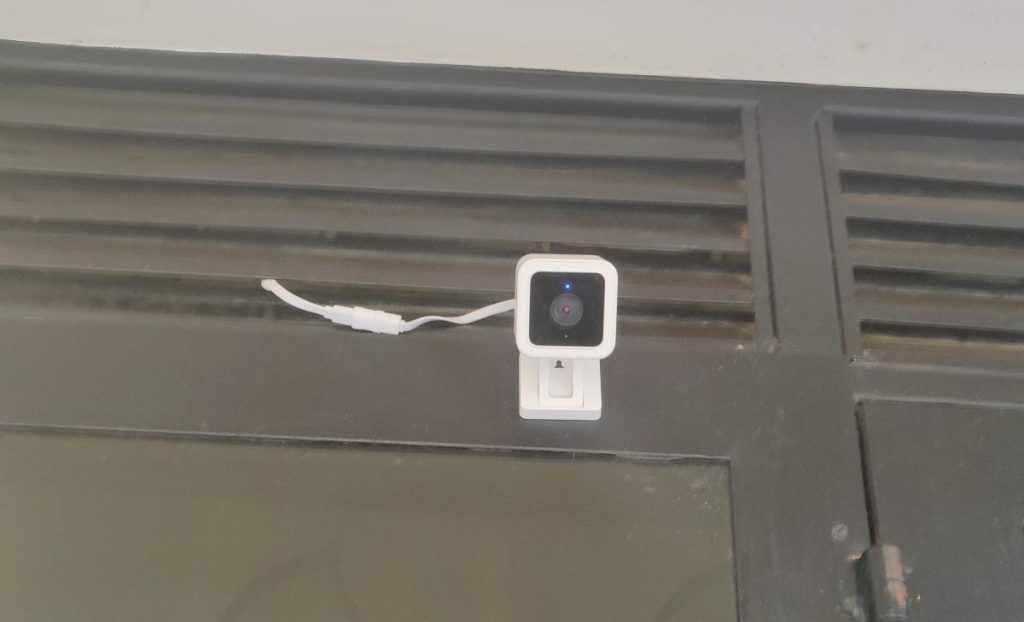
The Wyze Cam v3 supports color night vision thanks to a new starlight sensor with f/1.6 aperture which records night time video in full vivid color. Previously, you had to use the camera’s night mode to record video at night, but it showed in black and white. The other standard features you get are two-way audio, live view, continuous recording, motion and sound detection, local storage via MicroSD card and a cool siren. The Wyze Cam v3 is both an indoor and outdoor camera. It has an IP65 rating, so you can set it up outside in the rain or in your living room. I decided to install mine just outside the front door, so it’s outside but not exposed to the elements. Setting up the Wyze Cam v3 is surprisingly easy. Before you get started, make sure that;
You have installed the Wyze app and created an account. This is free. The camera can be powered by a wall socket. You have decided on the view area you want the camera to capture. This camera does not pan and tilt, however, it comes with a wide angle lens. Have a metallic surface to mount the camera or have your power tools ready to fix the metallic mount on the wall.
What comes in the box
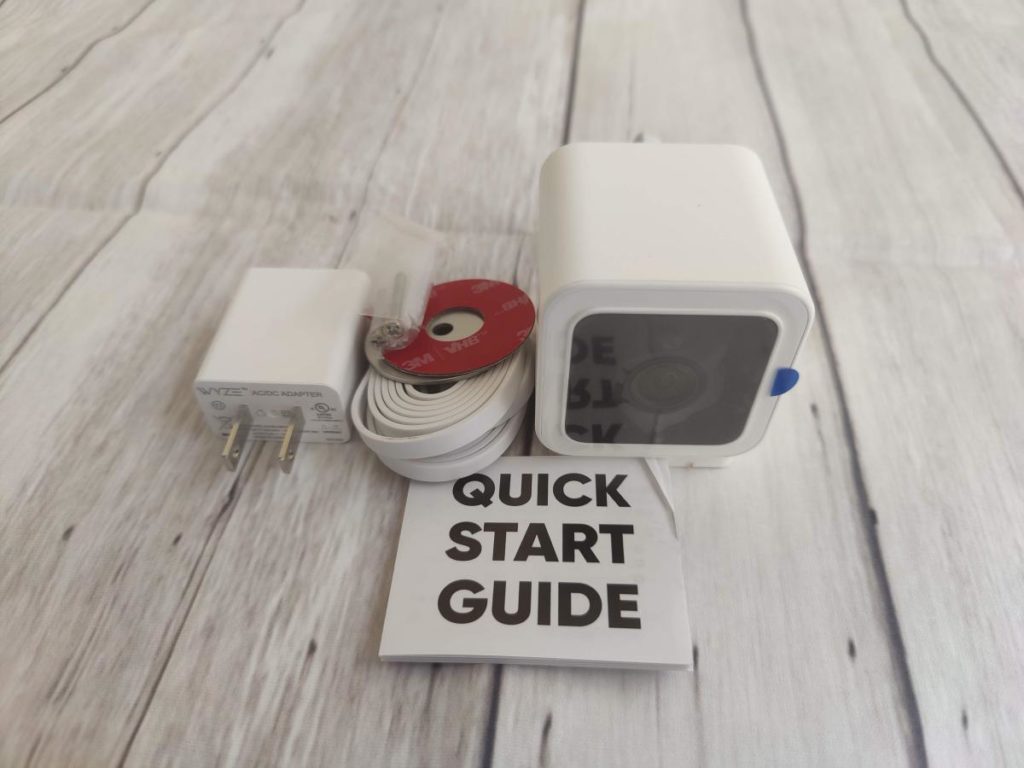
Inside the box, you get the Wyze cam itself, a wall mount plate, screw kit, 6 feet USB cable, wall mount plate tape and an indoor USB Power adapter. The base of the Wyze cam is magnetic, so if you are mounting it on an existing metallic surface such as a door or window frame, then you might not need the included installation accessories. But if you don’t, then you’ll have to screw the included circular-shaped metallic surface on the wall which your camera magnetically attaches to. Once your camera is mounted, setting it up is a breeze.
How to set up the Wyze Cam V3
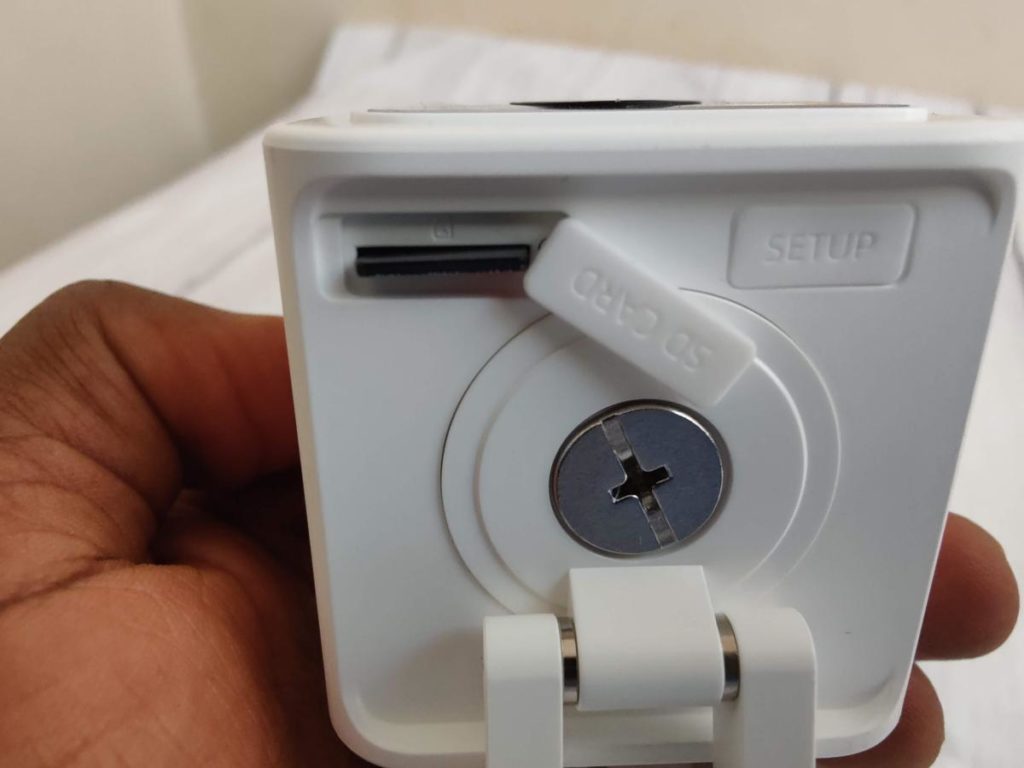
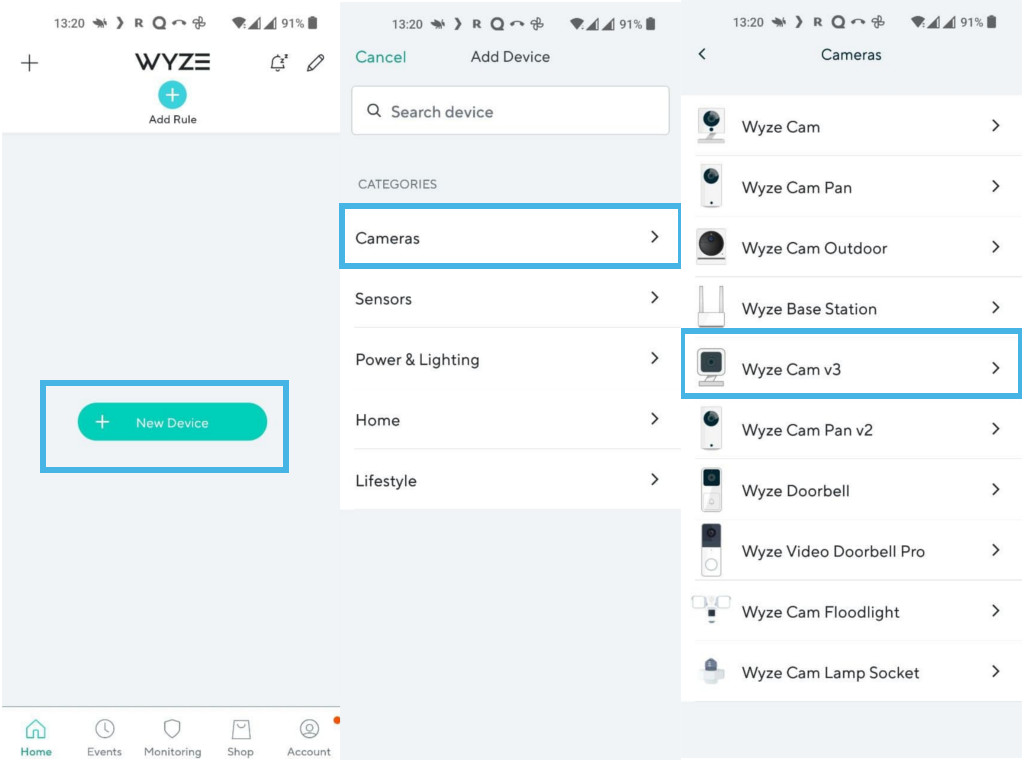
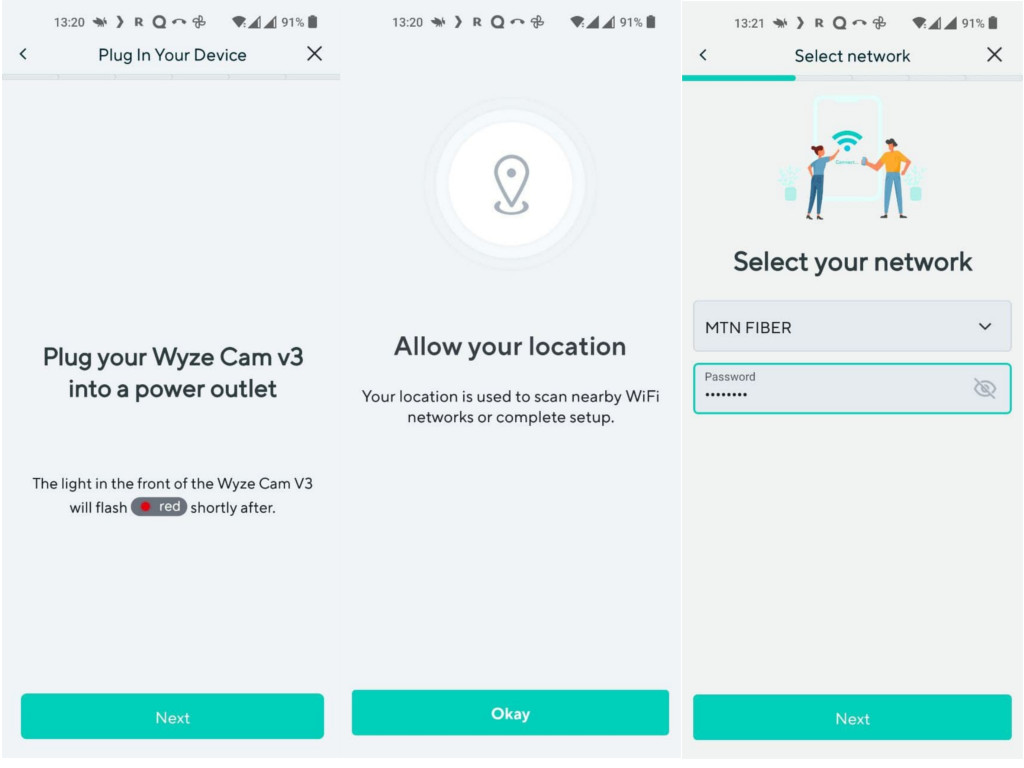
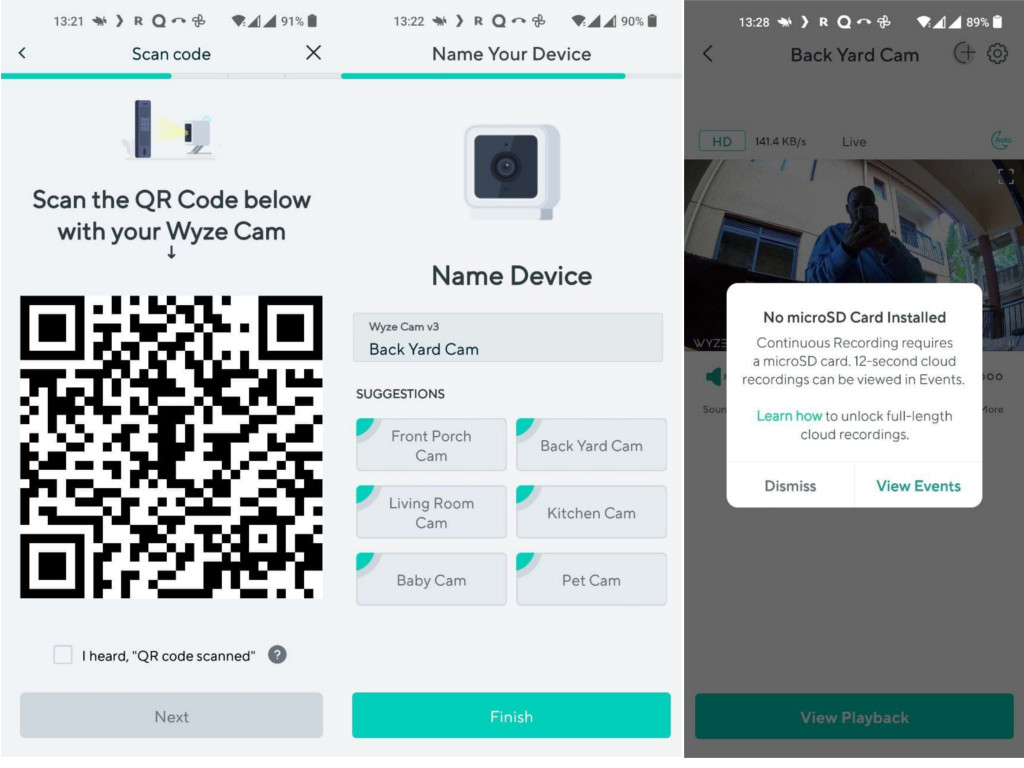
With the Wyze app already downloaded and an account created, start by powering on the camera. Wait for about 20 seconds until the status light flashes red. Inside the App, tap on “new device” or the plus sign on the top left corner > select camera > Wyze Cam v3. You’ll be prompted to plug the Wyze cam into a power socket outlet which you already did. Press the setup button on the base of the camera until you hear a voice prompt saying “Ready to connect”. You will have to pull the base away from the camera to access this setup button. It’s right next to the microSD card slot. Give the app location permissions. This is used to scan nearby WiFi networks which the camera will connect to. Select the WiFi network you wish to connect to. Make sure that your WiFi router supports WiFi 4 (802.11 n) on the 2.4GHz band. If you own a dual-band router that works on both 2.4GHz and 5GHz bands, create separate WiFi names or SSIDs for each band so that you can connect to 2.4GHz. This is really important, otherwise you might get stuck here. Next, scan the QR Code until you hear “QR code scanned”. Now I have had issues with the Wyze Cam Pan v2 not being able to scan QR code no matter how I positioned the camera or my phone. If you experience QR code pairing issues, you might want to try any of these strategies. Thankfully I didn’t experience issues with this cam. If all goes well, the cam should connect to your home WiFi network and you should be prompted to name your device. You can select from some of the suggestions in the app or write a name of your choice. You might also be prompted to update to the latest firmware.
Wyze Cam V3 specifications
2 x 2 x 2.3 inches.1080p resolution.130-degree field of view.Color night vision or Night vision with infrared.Two-way audio.MicroSD storage up to 32GB (not included)2.4 GHz Wi-FiIP65 (indoors or outdoors)14-day cloud storage.
