Before I show you how I do it, I have read a number of forums where users claim that you can take screenshots without any additional hardware. According to the forums, you enable developer mode on your Roku device, then open the Roku developer web interface from your computer from which you take screenshots. I tried all this, but failed. I learnt that this works if you want to take a screenshot of your newly developed Roku app or channel. However, you can’t use this method to take screenshots or screen casts of whatever is on the screen. The cheapest way still remains simply taking a picture of your Roku TV using your smartphone camera.
So let me show you how I take quality screenshots and make screen recordings of my Roku TV Streaming player.
Using an HDMI Splitter and Video capture card
The way that I capture screenshots and make screen recordings involves a combination of hardware components and software. This will only work for Roku streaming sticks with HDMI outputs. It won’t work on a stand alone Roku Smart TV. For this purpose, I use the Elgato Cam Link to capture video input from my Roku streaming player. I have the Roku Streaming Stick plus which I have been using in most of my Youtube Roku tutorial screencasts. Now The Elgato Cam Link 4K has two ports. One end is an HDMI input port while the end is a USB 3.0. The USB port should plug into your computer’s USB 3.0 port. Note that it only works with USB 3.0 ports since high bandwidth is needed to stream 4K content to your computer. You can also plug the Elgato Cam Link to a USB-C HDMI Hub if your computer doesn’t have enough USB 3.0 ports.
The other end of the HDMI Input is supposed to plug in to your Roku streaming player. However, this won’t work! If you did try, you will get a black screen video output. That’s because of HDCP or High-bandwidth Digital Content Protection. HDCP is a copy and content protection standard used by the movie and TV industry to fight against piracy and copyright infringement.
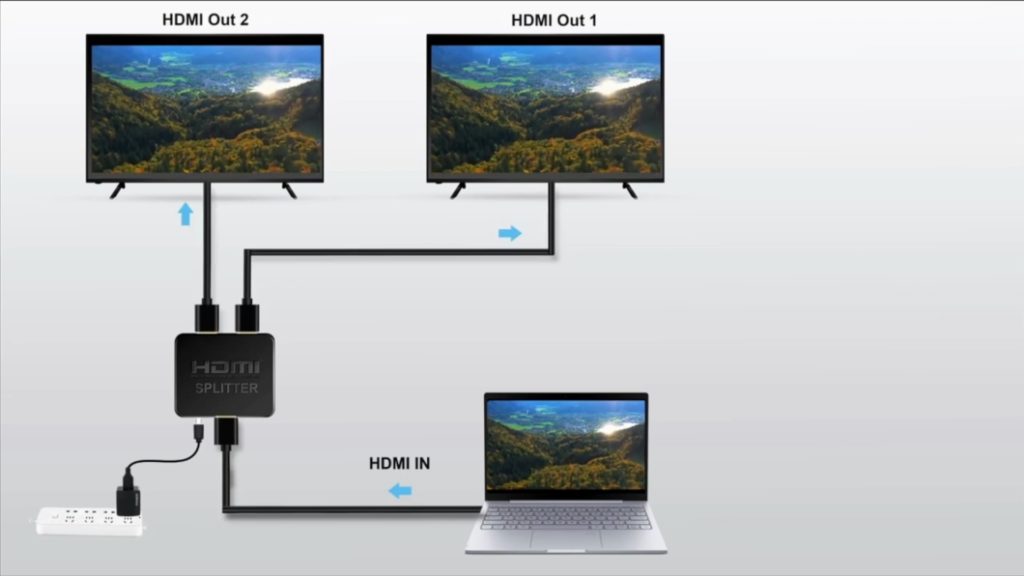
So, you need an HDMI Splitter. An HDMI Splitter duplicates an HDMI video source into several output channels. For instance, a 1 by 2 HDMI Splitter distributes one HDMI source to two displays simultaneously.
I plugged in my Roku Streaming stick to the HDMI input end of the Avedio HDMI Splitter….Then connected the Elgato Cam Link to one of the HDMI outputs of the Splitter.The Elgato Cam Link then connects to the USB 3.0 port of my computer, which in my case is a Mac Mini.
On the software end, I use OBS or Open Broadcaster Software. It is a free and open source software for video recording and live streaming. This software is great for recording or live streaming anything you can capture on your video card, DSLR camera, webcam or your computer screen.
Alright, now let me show you how to take screenshots or make screen recordings of the Roku streaming player on OBS.
Using OBS to capture Screenshots and screencasts Roku streaming stick plus
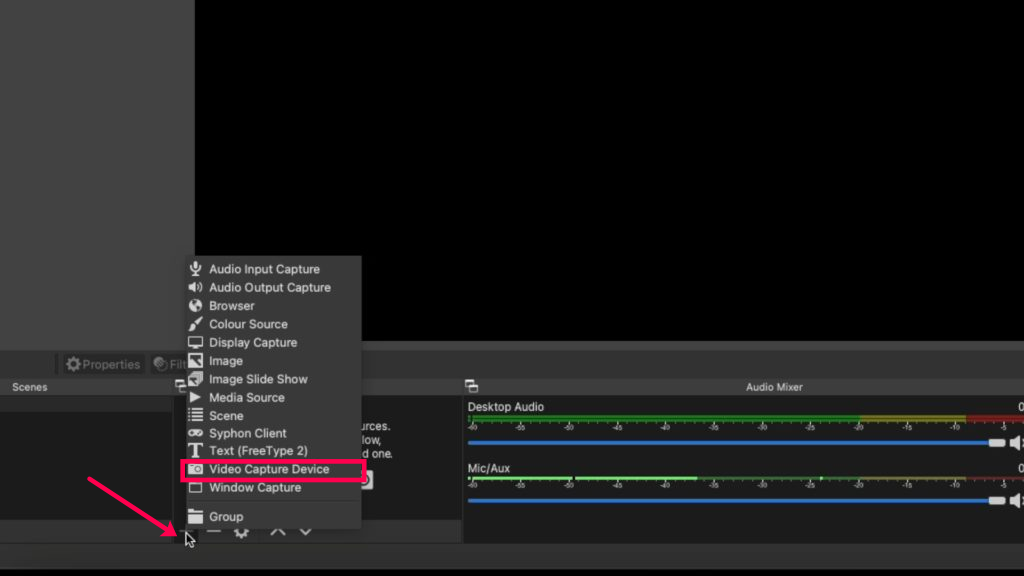
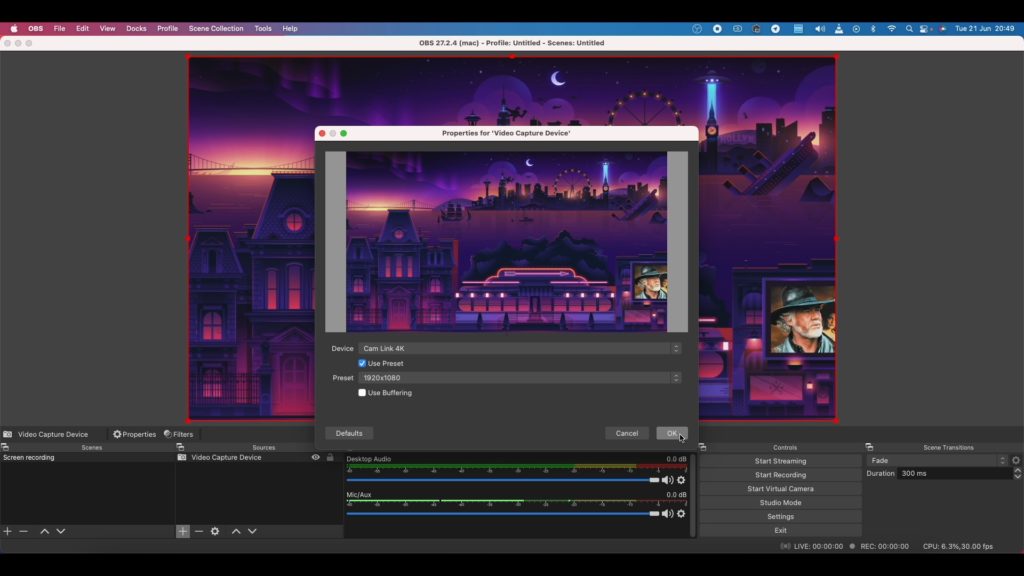
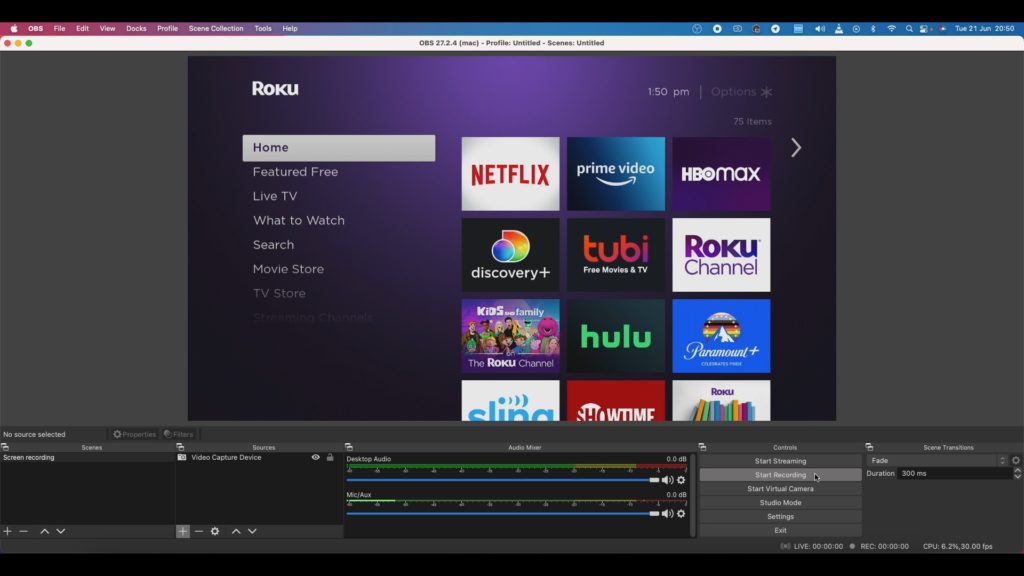
Alright, now with everything setup and connected as I have already described, start the OBS software from your computer. The Elgato Cam Link works with OBS without any additional drivers. So it’ll automatically be detected. From OBS, select Video Capture Device from the sources panel and then select the Cam Link 4K as your source device. The Roku streaming player video screen will appear on the main window. You can now select Start Recording on the Controls panel to start your video screencast. When done, simply click on Stop Recording. The video file is automatically saved on your computer.
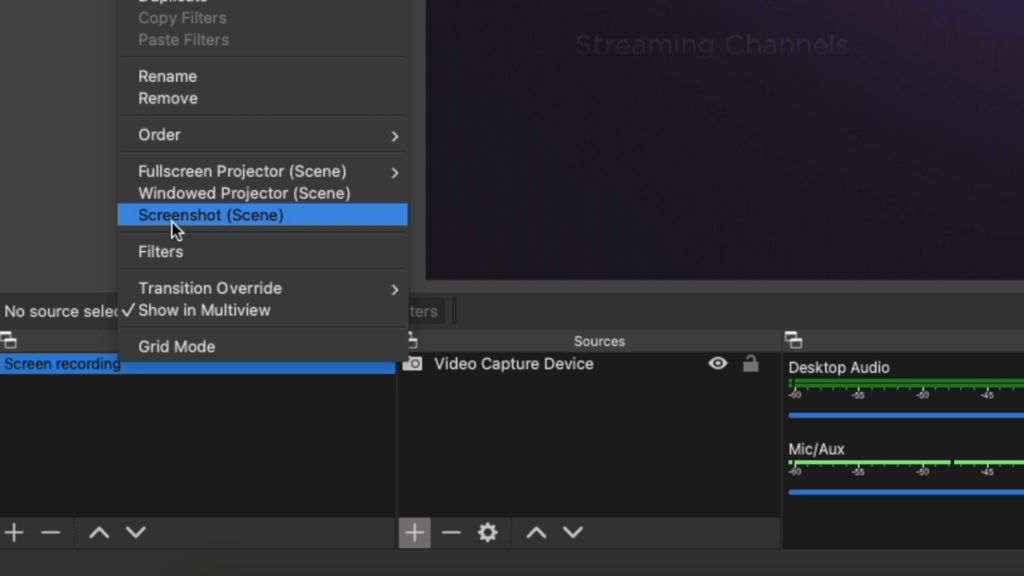
To take an image Screenshot of your Roku streaming stick;
Go to the scenes panel and Then right-click on Screen recording and Then select Screenshot(Screen).
The image of the Roku screen will be saved on your computer.
You can also choose where exactly your screenshots or screen recordings are stored on your computer. To do that, go to OSB and select Preferences. Then Select Output option on the left sidebar. Under the Recording section, come to the Recording path input field and click on browse to choose the folder you wish your screenshots or recordings to be saved. You can also choose the output recording format for your screencasts. I prefer mp4. This sums up how to take screenshots and screencasts of your Roku streaming stick. If you have any questions, let me know in the comments below.